White underbase
A white underbase you can see before you print.
NestSheet derives the white from the artwork’s alpha and puts every lever in your hand — choke, threshold, mode, amount, halftones — with a split preview of the exact channel your RIP receives.
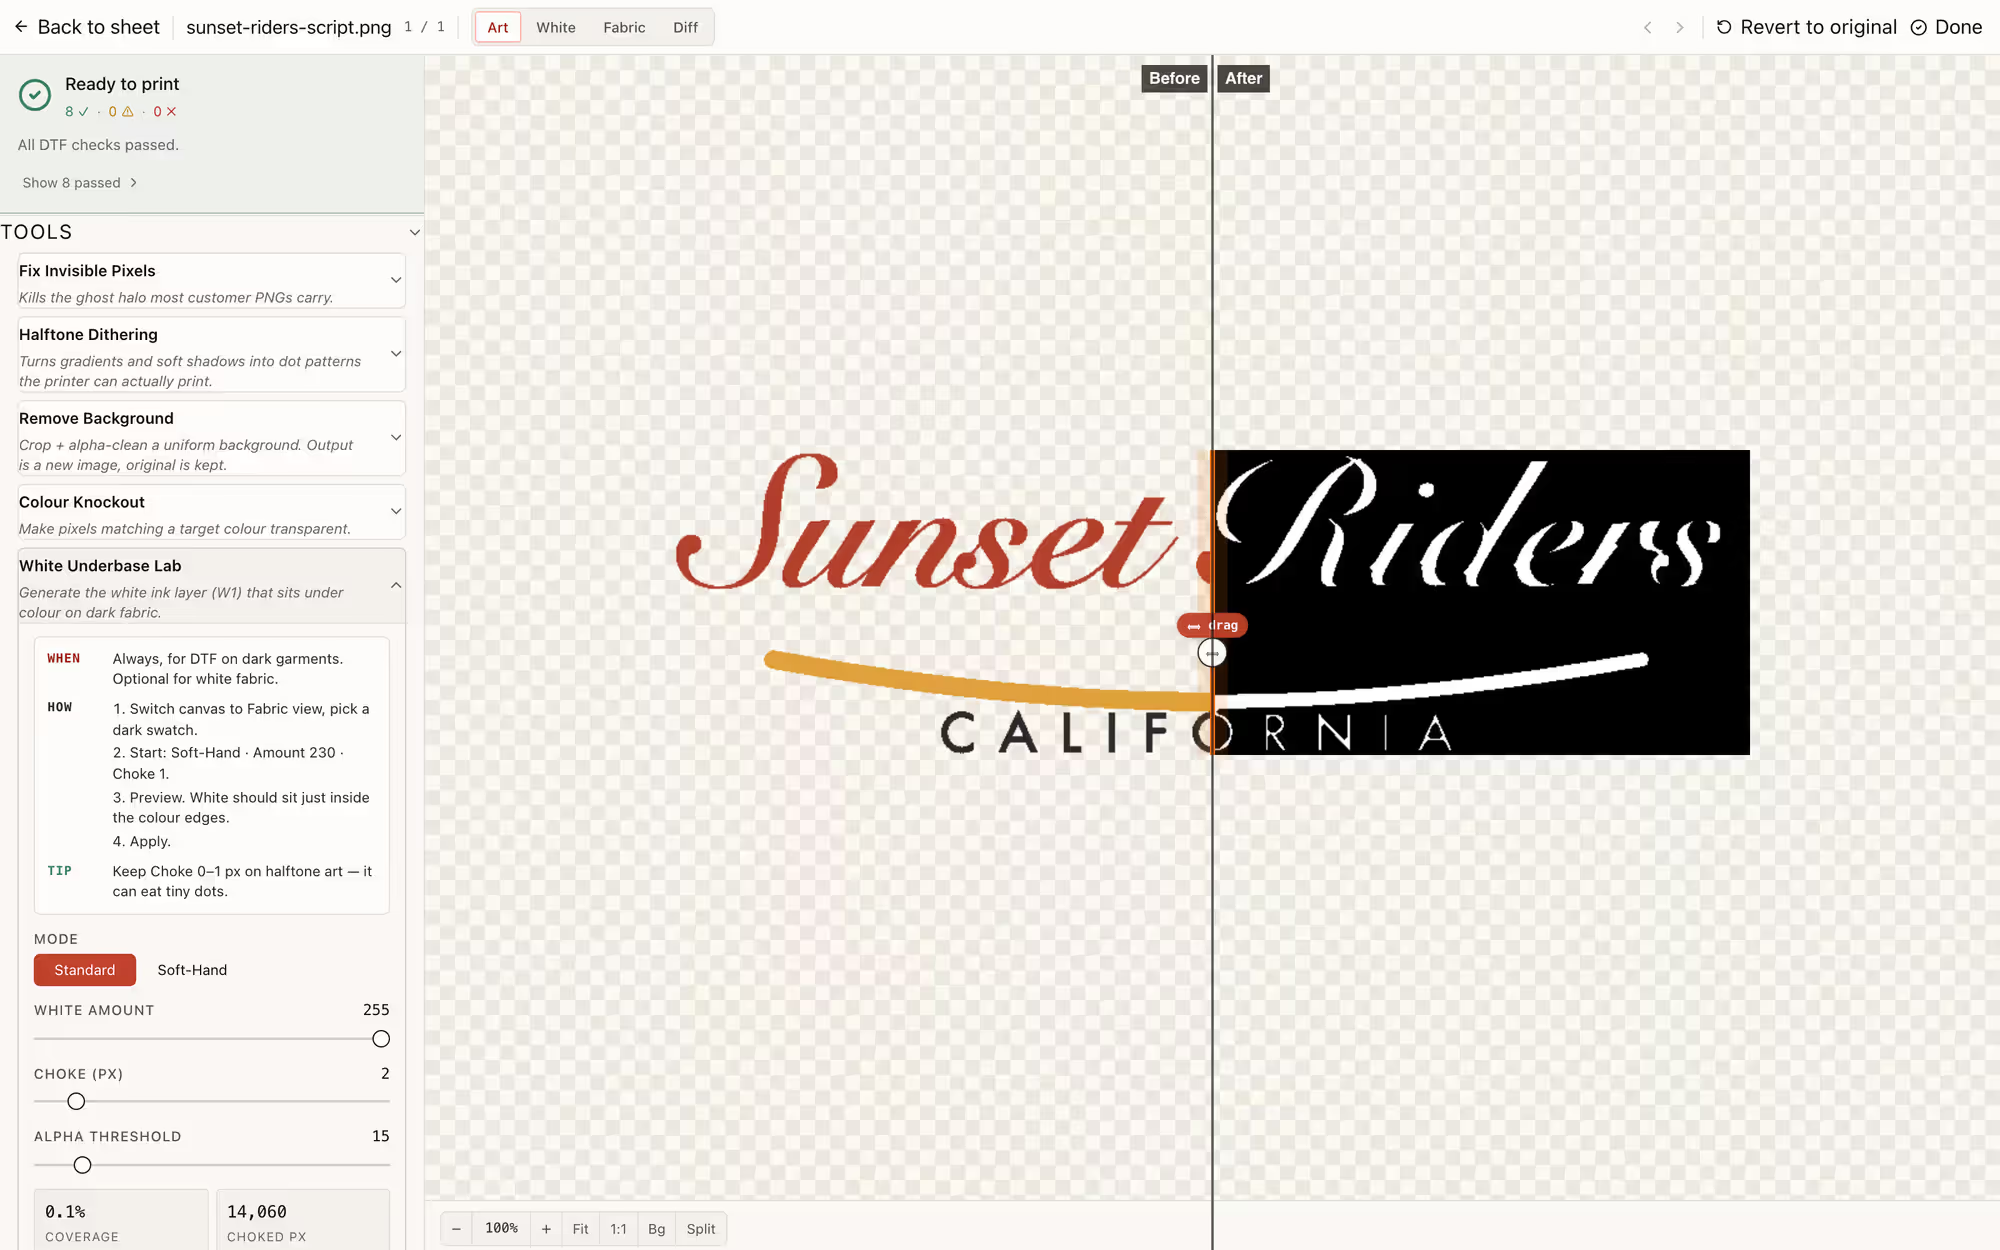
The halo test
Where the white outline comes from.
White that prints wider than the colour above it shows as a pale edge on dark garments. Choke pulls the white in — and the preview shows exactly how far.
- The white channel is derived from the artwork’s alpha — no hand-masking in Photoshop, nothing to forget on piece 37 of 43.
- Choke erodes the white edge inward by 0–10 px; the default is 2 px. At 300 dpi, 2 px is roughly 0.17 mm — enough to hide small registration shifts without visibly shrinking the art.
- The alpha threshold (0–255) decides how faint a pixel still earns white — your lever against remove-bg leftovers and semi-transparent edges.
- The pair below is the same artwork at choke 0 and choke 2 px — the halo test, on the actual generated channel.


The Lab
Tune it like a press setting, not a Photoshop ritual.
The White Underbase Lab lives in the Prep terminal: mode, white amount, choke and threshold, with live coverage numbers and a draggable before/after split of the channel itself.
- Standard mode lays solid white under every qualifying pixel; soft-hand runs a 4×4 Bayer dither that keeps ~70% of white pixels for a lighter hand on thin fabrics.
- White amount scales the whole channel, 0–255 — for garments that want a thinner base overall rather than a choked edge.
- Coverage and choked-pixel counts update live, so you see what a setting costs before film does.
- Mode “none” exists too — the underbase is a choice per export, not a default you fight.
Halftones
Three halftone methods for the white itself.
Gradients and fades need a white base that fades with them — solid white under a soft edge prints as a hard-edged slab.
- Ordered, Floyd–Steinberg or stochastic dithering, dot size 1–24 px — applied to the white channel using the artwork’s alpha as density.
- Halftoned white is how semi-transparent artwork keeps its softness on a dark garment instead of gaining a solid slab underneath.
- You preview the dithered channel itself, not an artist’s impression of it.
In the file
The white you previewed is the white that ships.
At export the same tuning is written into the press file: TIFF with the white as extra channels, or PSD/PSB with real spot channels — named W1 onwards and renameable to your RIP’s convention. The preview shows the generated channel, so “looked fine on screen” still holds at the press. The full format matrix lives on the export page.
Spec sheet
The underbase parameters, from the code.
Every value below is read from the shipped product, not from a wishlist — the sources are in this page’s code.
| Parameter | As shipped |
|---|---|
| Source | artwork alpha channel |
| Choke | 0–10 px, default 2 (≈ 0.17 mm at 300 dpi) |
| Alpha threshold | 0–255 |
| Modes | Standard / Soft-hand / None |
| Soft-hand | 4×4 Bayer dither, ~70% of white pixels kept |
| White amount | 0–255, scales the whole channel |
| Halftone | Ordered / Floyd–Steinberg / Stochastic, dot size 1–24 px |
| Output | TIFF extra channels or PSD/PSB spot channels, named W1… (renameable) |
| Preview | draggable before/after split + live coverage counts |
FAQ
The questions operators actually search.
Why is there a white outline on my DTF print?
What choke setting should I use?
Why do my prints look faded on dark shirts?
How do I fix a dusty white halo?
Keep going