How it works
From client artwork to press-ready film — one pass, no Photoshop.
NestSheet is the prepress layer before your RIP: it takes the order folder, packs the sheet, generates the white, and writes a file your RIP opens first try. Here is the whole workflow, screen by screen.
Step 1 · Upload
Drop the order folder as it came in.
Ten formats — PNG, JPEG, TIFF, WebP, PSD, PSB, EPS, AI, PDF, SVG — up to 500 MB a file. No “please resave as…” emails to customers.
- CMYK TIFFs and PSDs are normalised to sRGB with their embedded ICC profile respected — no silent colour jumps.
- 8-channel DTF TIFFs (CMYK + white) are read natively on the way in.
- Transparent padding is trimmed off automatically, so the print size is the artwork, not the canvas.
- Low-DPI files are flagged in the rail — including the iPhone “72 dpi” lie, which is auto-corrected instead of shrinking your art.
- Preflight is advisory only: quiet warnings, no blockers, no red-alert theatre.

Step 2 · Nest
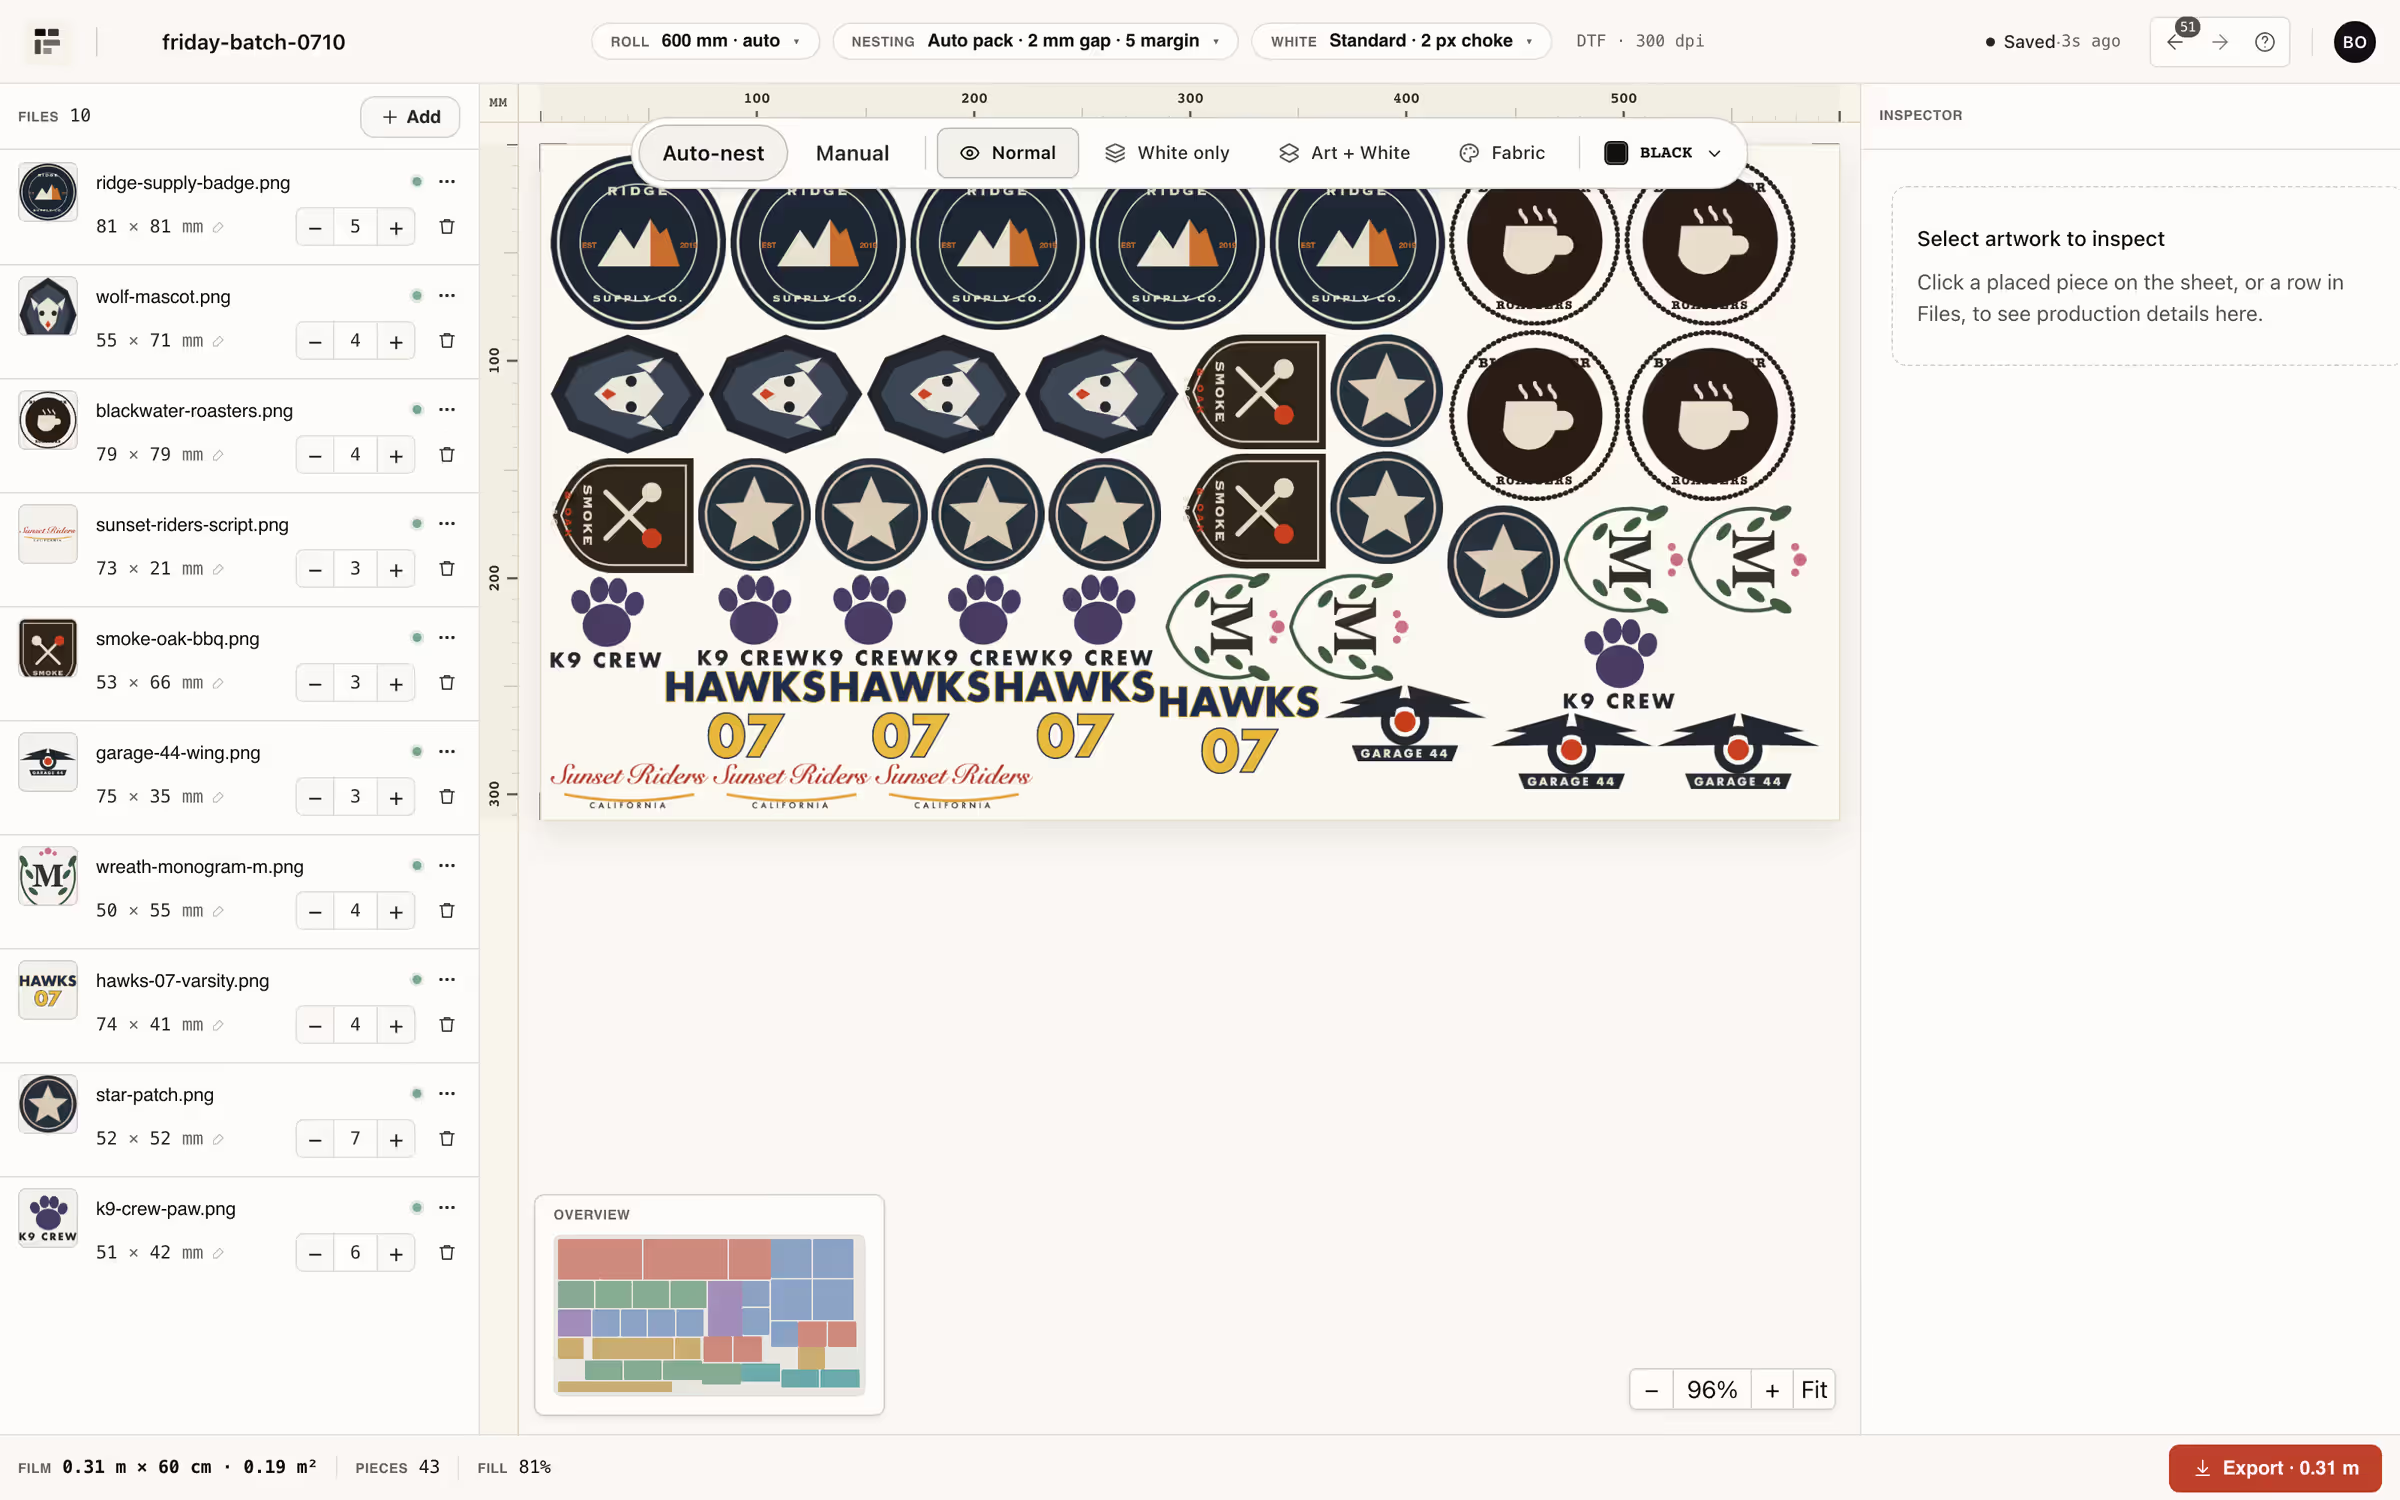
The packer does the Tetris. You keep the veto.
Auto-nest is on by default: every copy of every file is packed with rotation 0/90°, honouring your gap and margin, on the roll you actually run.
- Roll presets from 300 to 1800 mm plus A4/A3/A2 sheets — or a custom sheet up to 2000 × 10000 mm.
- Defaults an operator would pick: 2 mm gap, 5 mm margin, auto sheet height that grows with the batch.
- Per-file copy counts live in the rail — bump a design to ×6 and the sheet repacks around it.
- Film length, m² and fill stay on screen while you work, so the cost of a layout is never a surprise.
- Prefer to place by hand? Switch to Manual and drag — auto-nest is a mode, not a cage.
Step 3 · White & inspect
Get the white right before it hits film.
The White Underbase Lab derives the white channel from the artwork alpha — choke 0–10 px (default 2), alpha threshold, standard or soft-hand modes — with a before/after split you can drag.
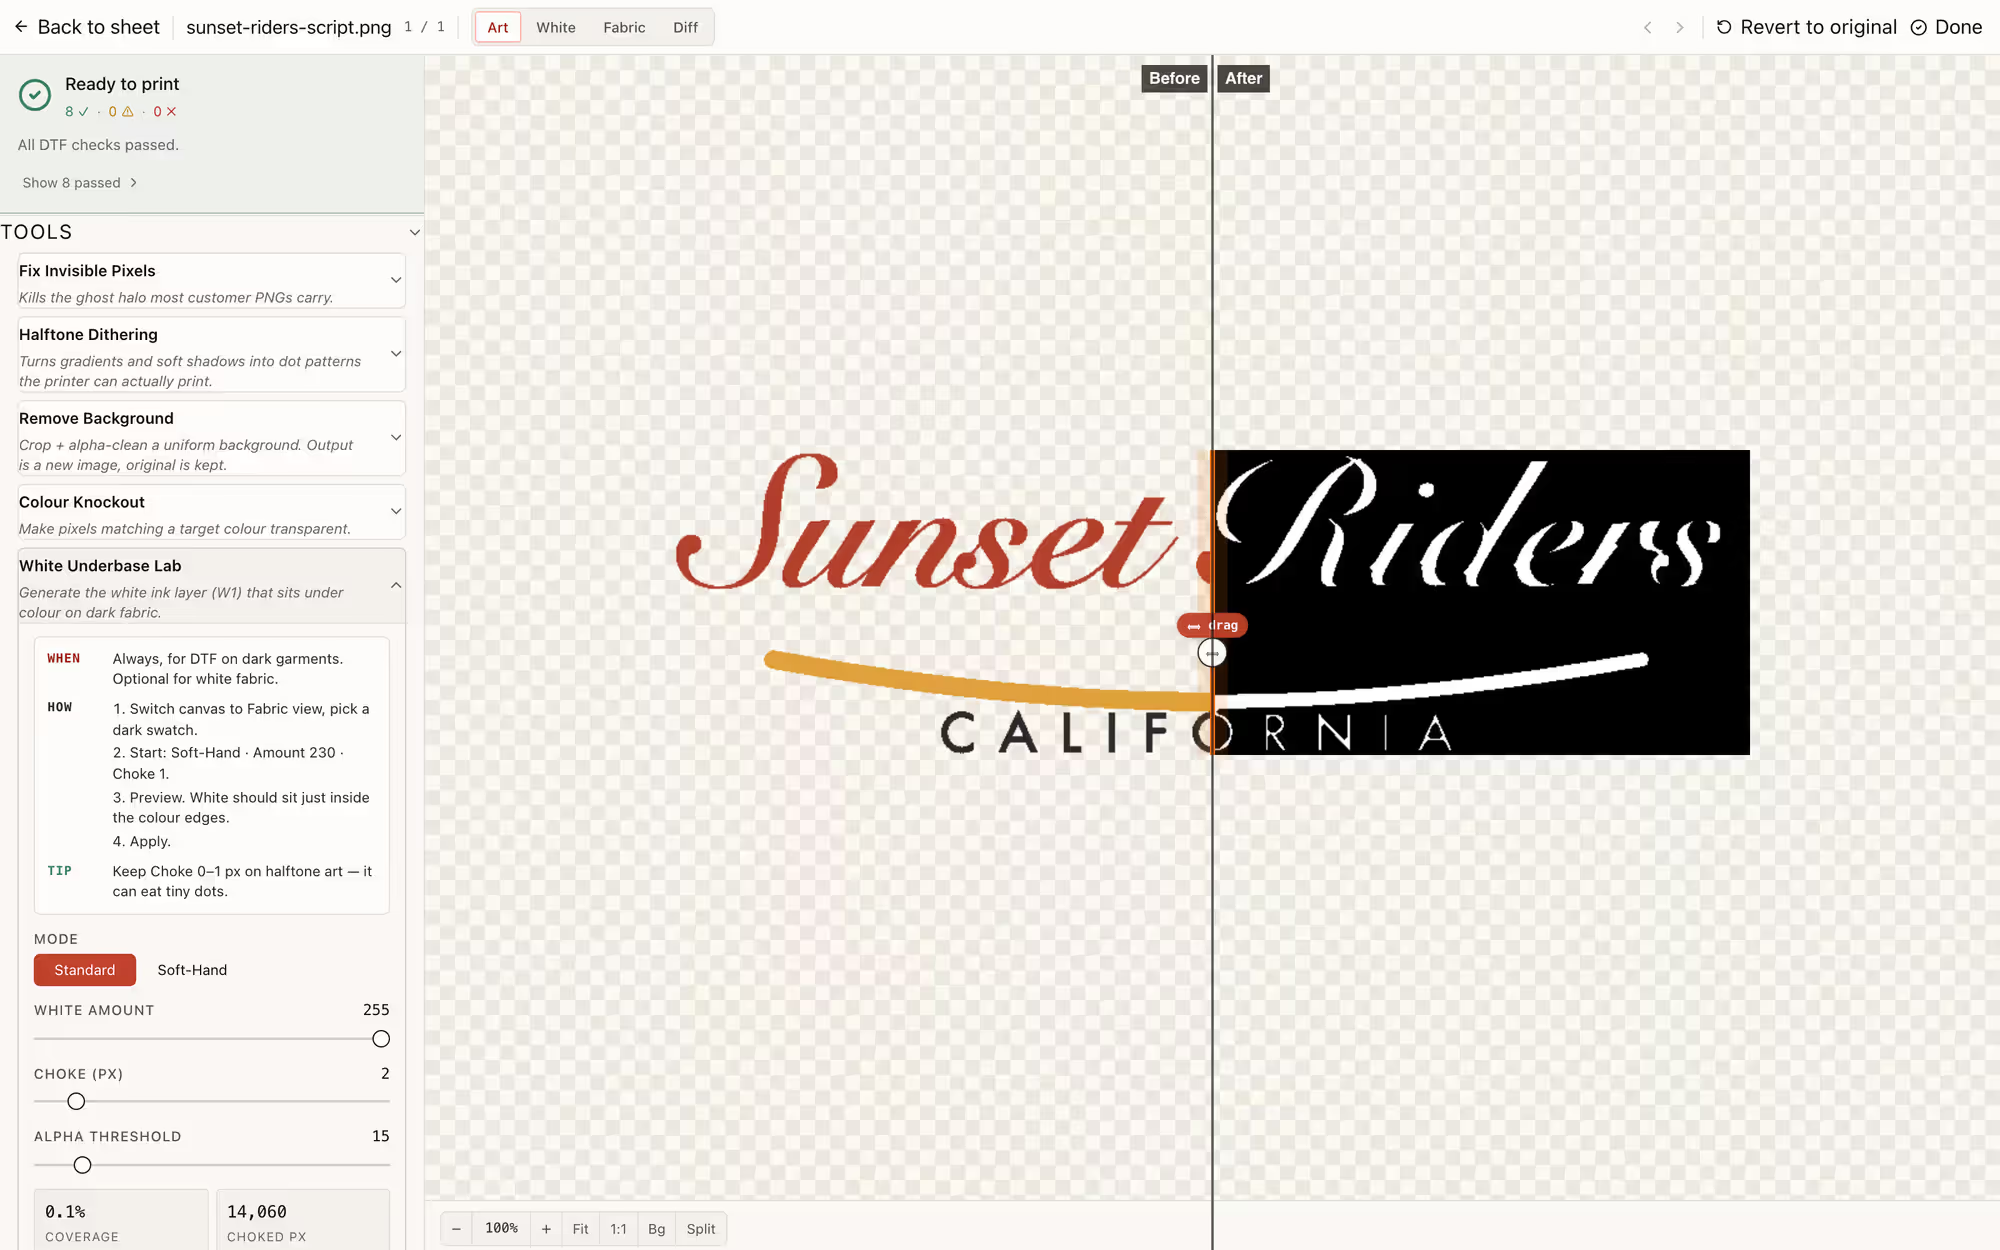

Six in-place fixes ship in the Prep terminal — remove background, fix invisible pixels, colour knockout, fringe doctor, halftone dithering and the White Underbase Lab — applied as a reversible stack that never touches the original file. AI-assisted white-relief and varnish masks are available too. Every plan has the same tools; only the monthly exported-area allowance changes.
Step 4 · Export
Write the file your RIP expects — the first time.
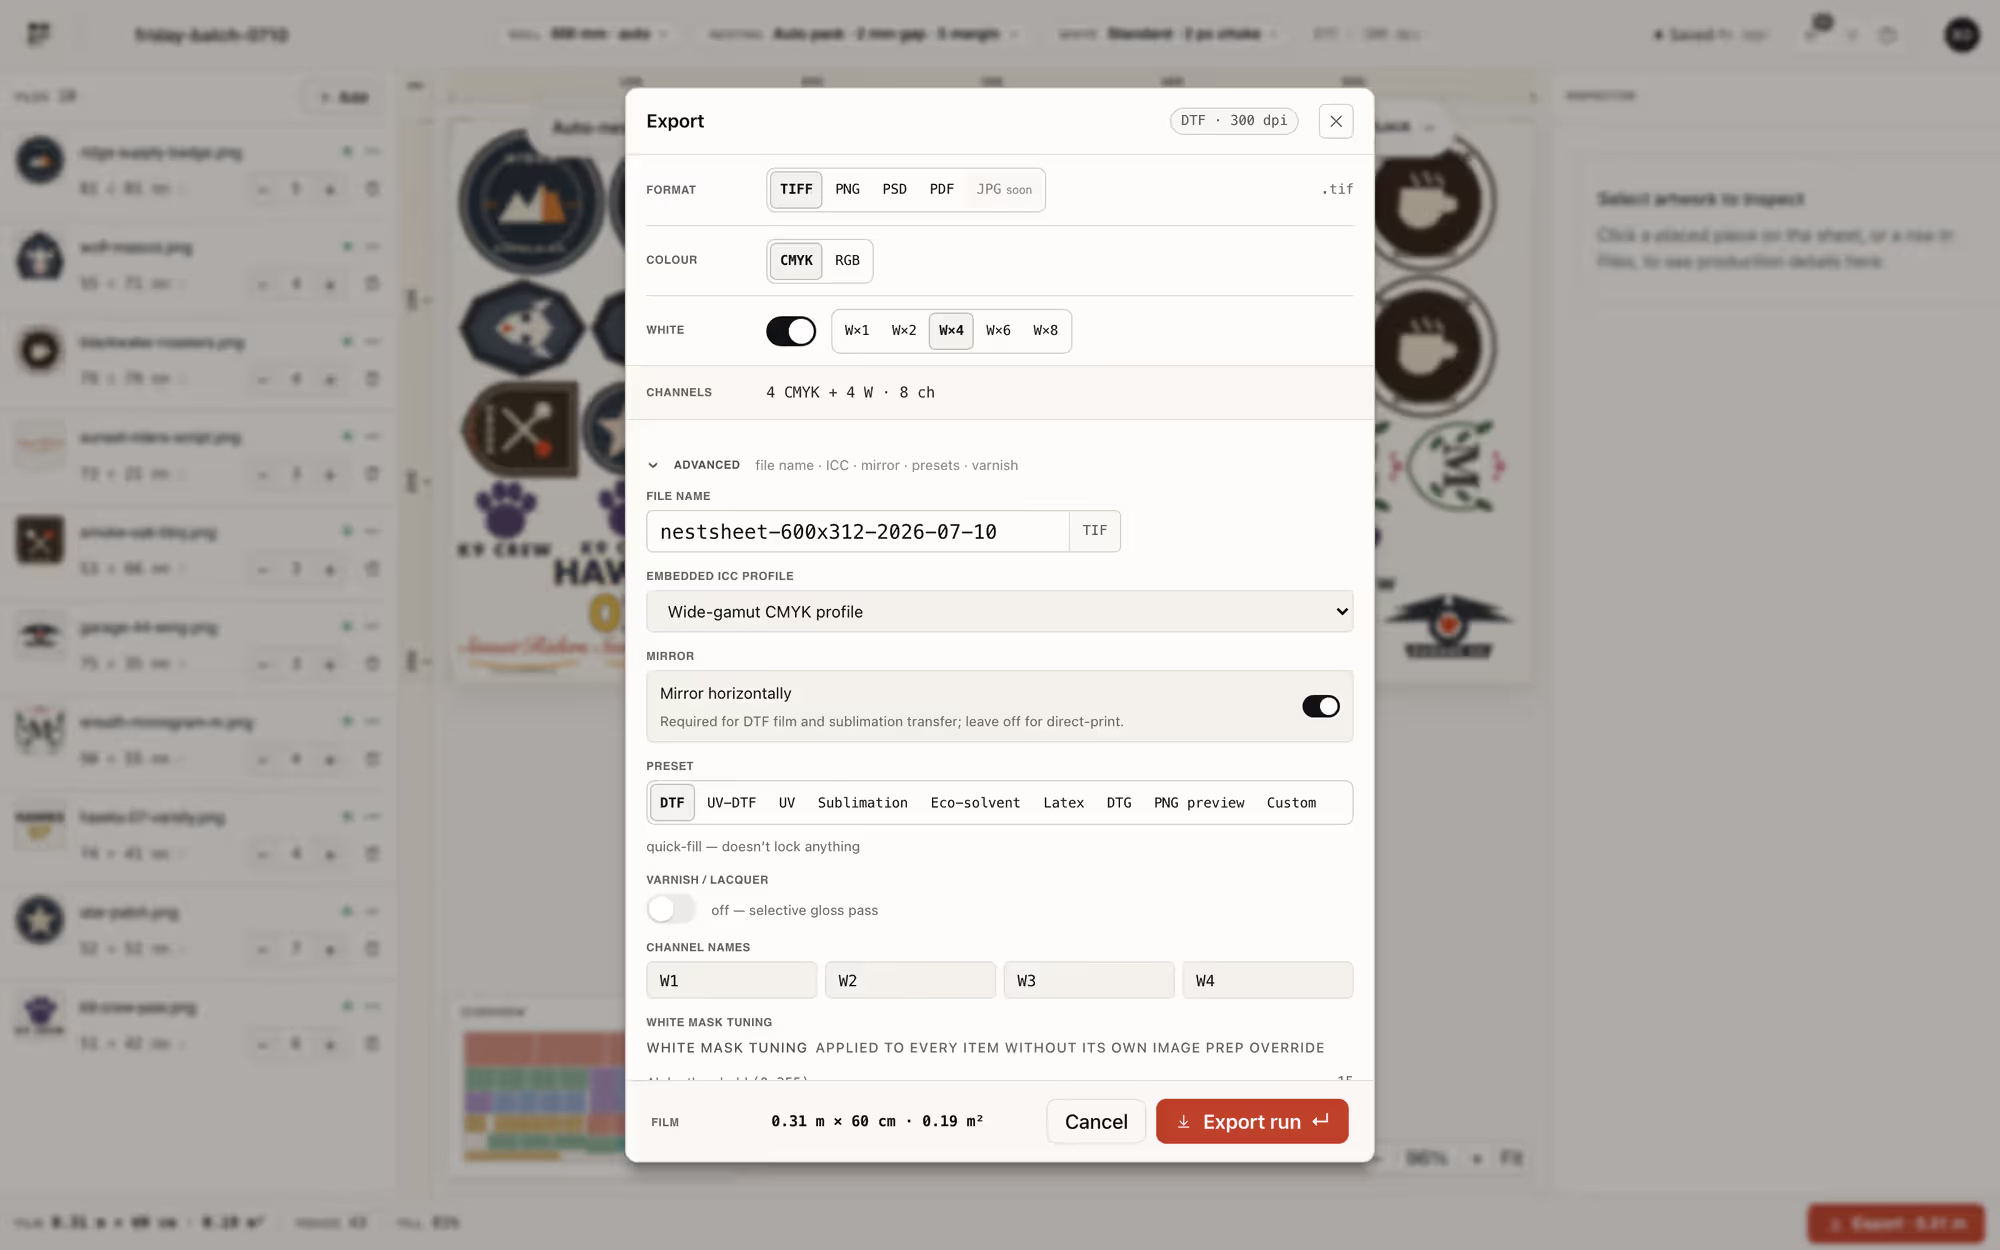
Nineteen export recipes across TIFF, PNG, PSD/PSB and PDF: up to CMYK + 4 white + 4 varnish channels, real spot channels in PSD, channel names your RIP already knows.
- Six RIP presets in the box: MainTOP, CadLink Digital Factory, AcroRip, PhotoPRINT, SAi Flexi and Generic DTF.
- White and varnish channels named W1–W8 / V1–V4 — renameable per export to match any RIP’s convention.
- Four ICC output intents: sRGB, Adobe RGB, FOGRA39, Epson wide-gamut CMYK.
- Mirror-for-film toggle, custom file naming, and a varnish pass when the job calls for it.
- Every render lands in your export history and stays downloadable for 72 hours.
Roadmap
What’s coming — and what isn’t here yet.
We put features on this site when they ship, not before.
On the roadmap: a UV-DTF mode in the UI (the varnish export pipeline is already built), automatic multi-sheet split for orders that outgrow one sheet, a public API, and more named RIP presets. None of it is sold on this site until it ships — what you saw in the four steps above is the product as it exists today.
FAQ