You own the printer. The gang sheet shouldn’t be the slowest machine in the shop.
DTF prepress for shops that print in-house: the layout, the white and the export handled at the bench — before the RIP, not inside it.
The situation
What this bench actually deals with.
An in-house DTF shop touches the same four jobs on every batch: get the client files in, pack the roll, get the white right, and write a file the RIP accepts. None of these is hard once. All of them are expensive when they repeat forty times a day through a raster editor and a folder of export presets.
NestSheet is the bench where those four jobs happen in one pass, in the browser, with the film math on screen. It does not print, it does not RIP, it does not take orders — it turns the folder your orders arrived in into the file your press runs.
The layout eats the operator
Packing mixed artwork by hand is judgement work at the start of the day and endurance work by the afternoon — and the film pays for every shortcut.
White is invisible until it isn’t
A halo you only discover on pressed fabric is the most expensive kind of proofing. The white channel needs to be a previewed decision, not a print-time surprise.
The RIP is picky and it’s right to be
Wrong channel names, wrong colour space, flattened spots — every “fix the file first” round trip is minutes with the press idle.
Step 1 · Upload
Drop the order folder as it came in.
Ten formats — PNG, JPEG, TIFF, WebP, PSD, PSB, EPS, AI, PDF, SVG — up to 500 MB a file. CMYK inputs are normalised to sRGB with their embedded ICC respected; low-DPI files get flagged in the rail instead of surprising you on film.

Step 2 · Nest
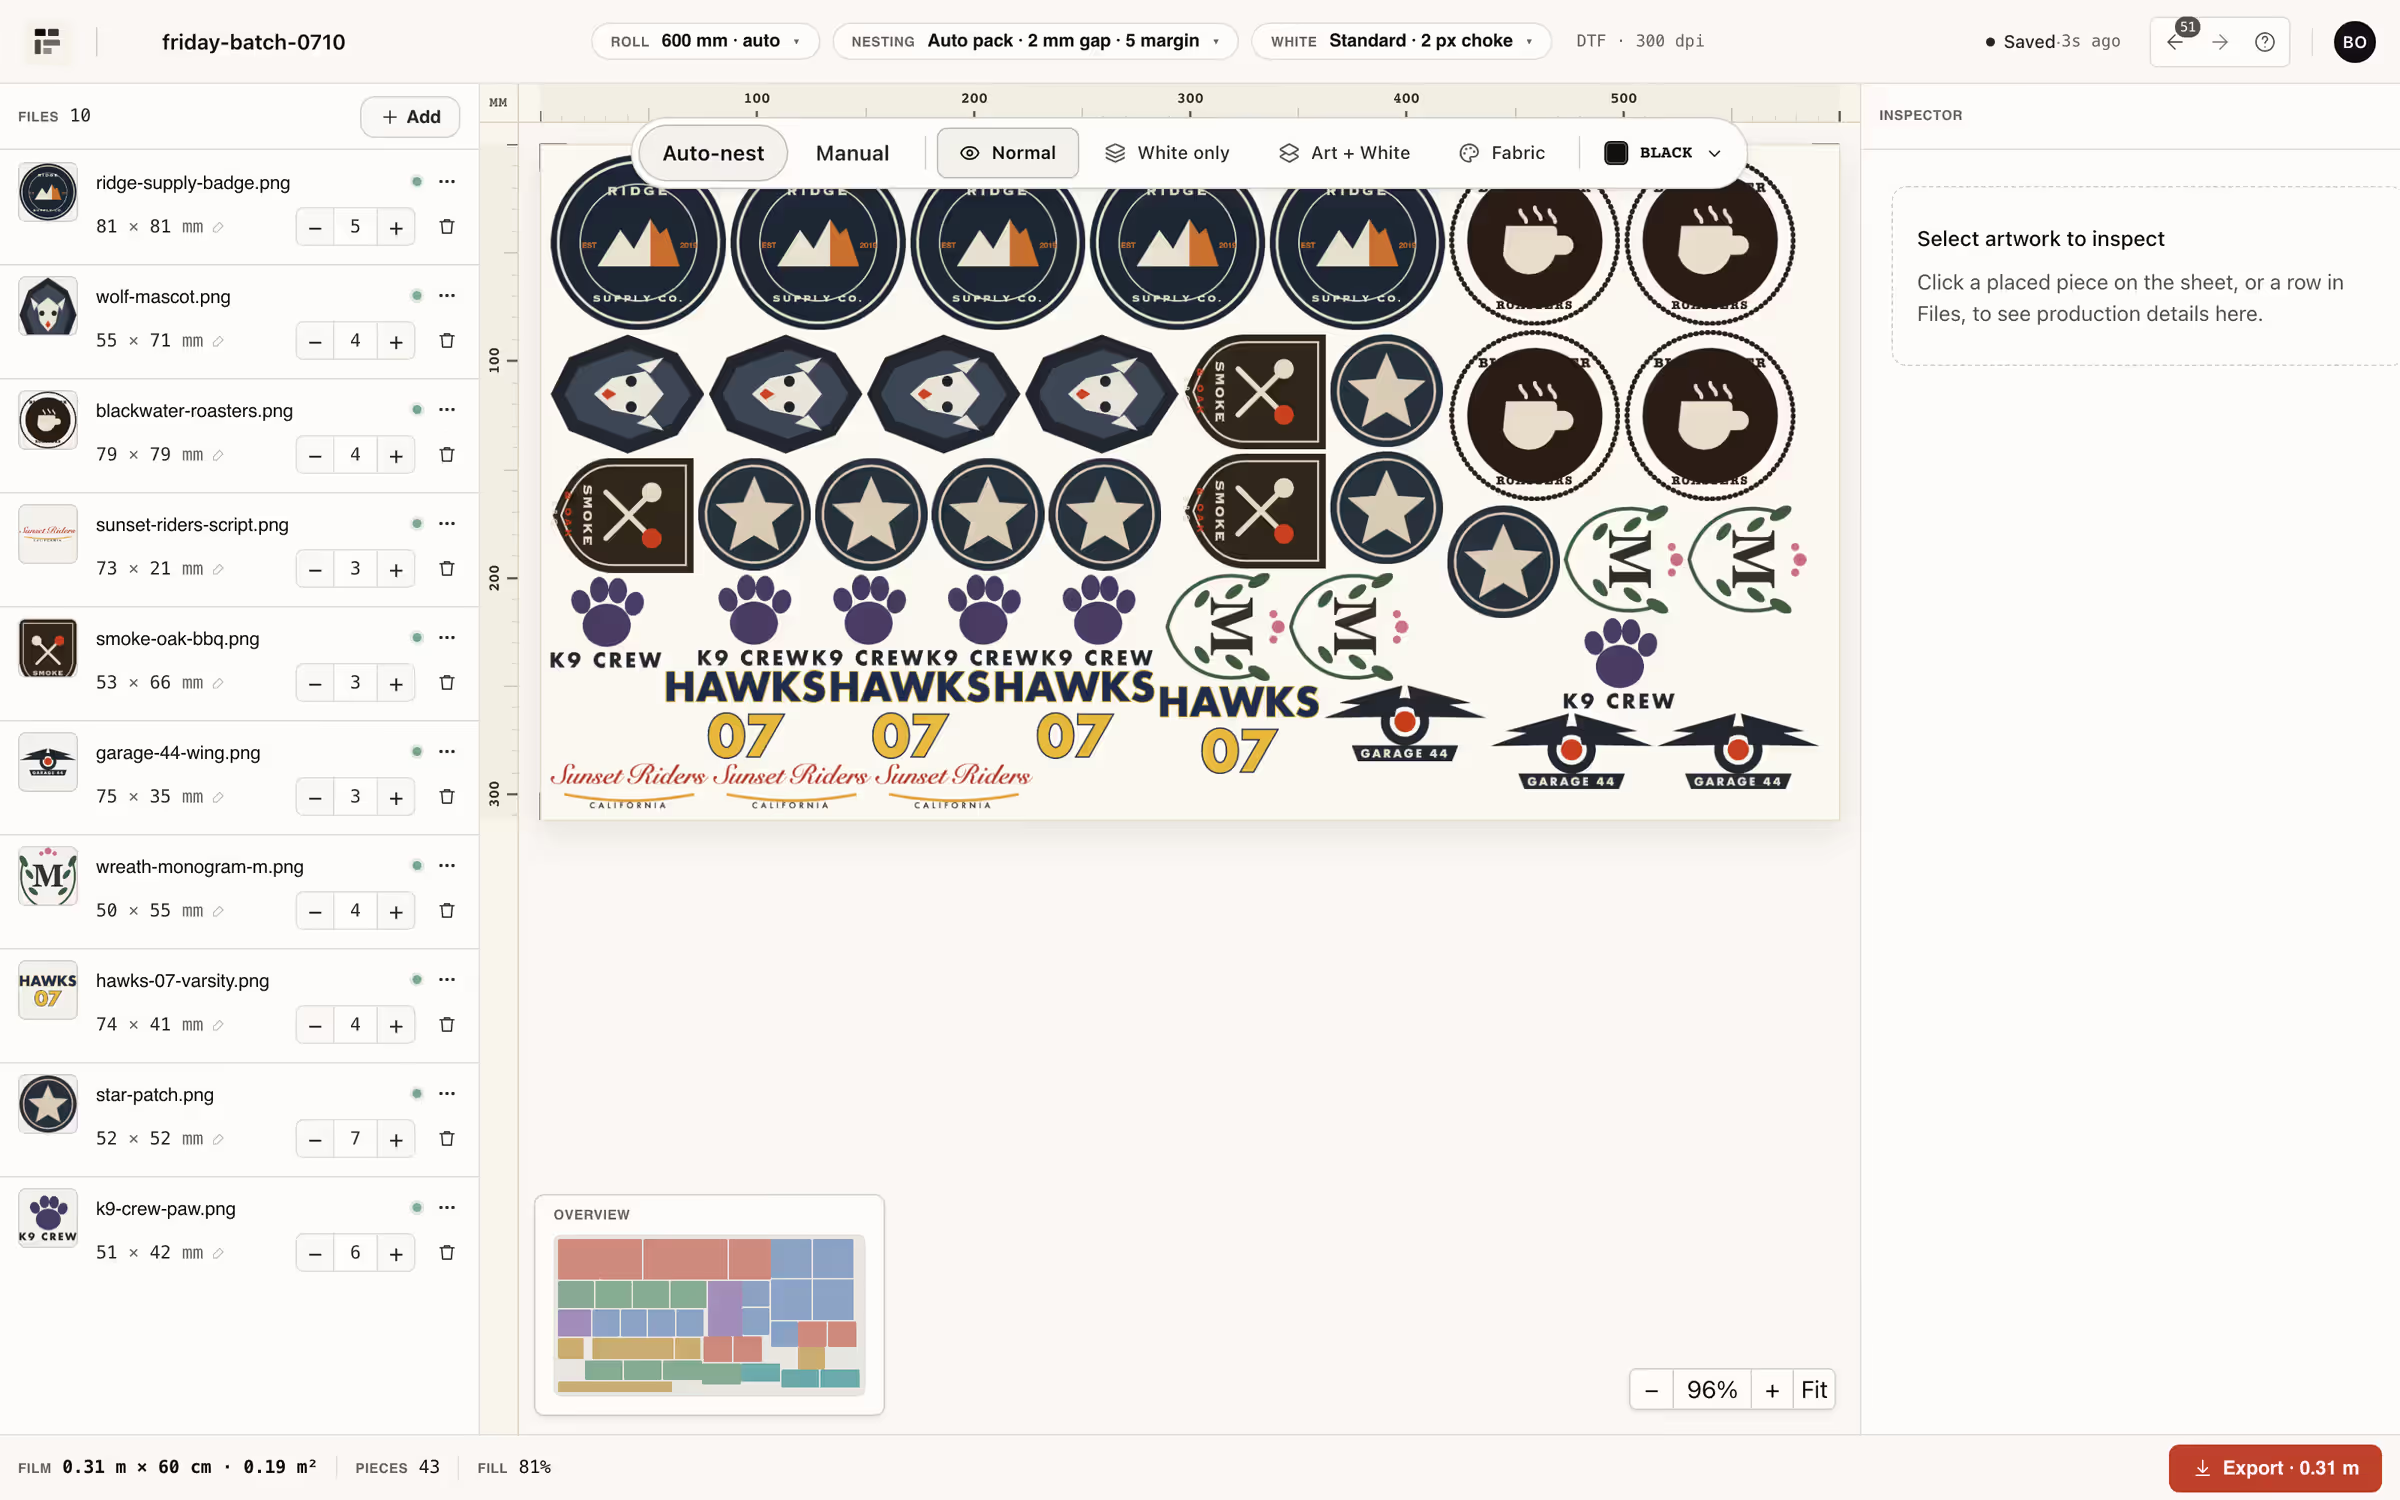
The packer does the Tetris on your roll width.
Auto-nest is on by default: rotation 0/90°, your gap and margin (2 mm / 5 mm defaults), auto sheet height, roll presets from 300 to 1800 mm. Film length, m² and fill stay on screen, so the cost of a layout is never a surprise.
Step 3 · White
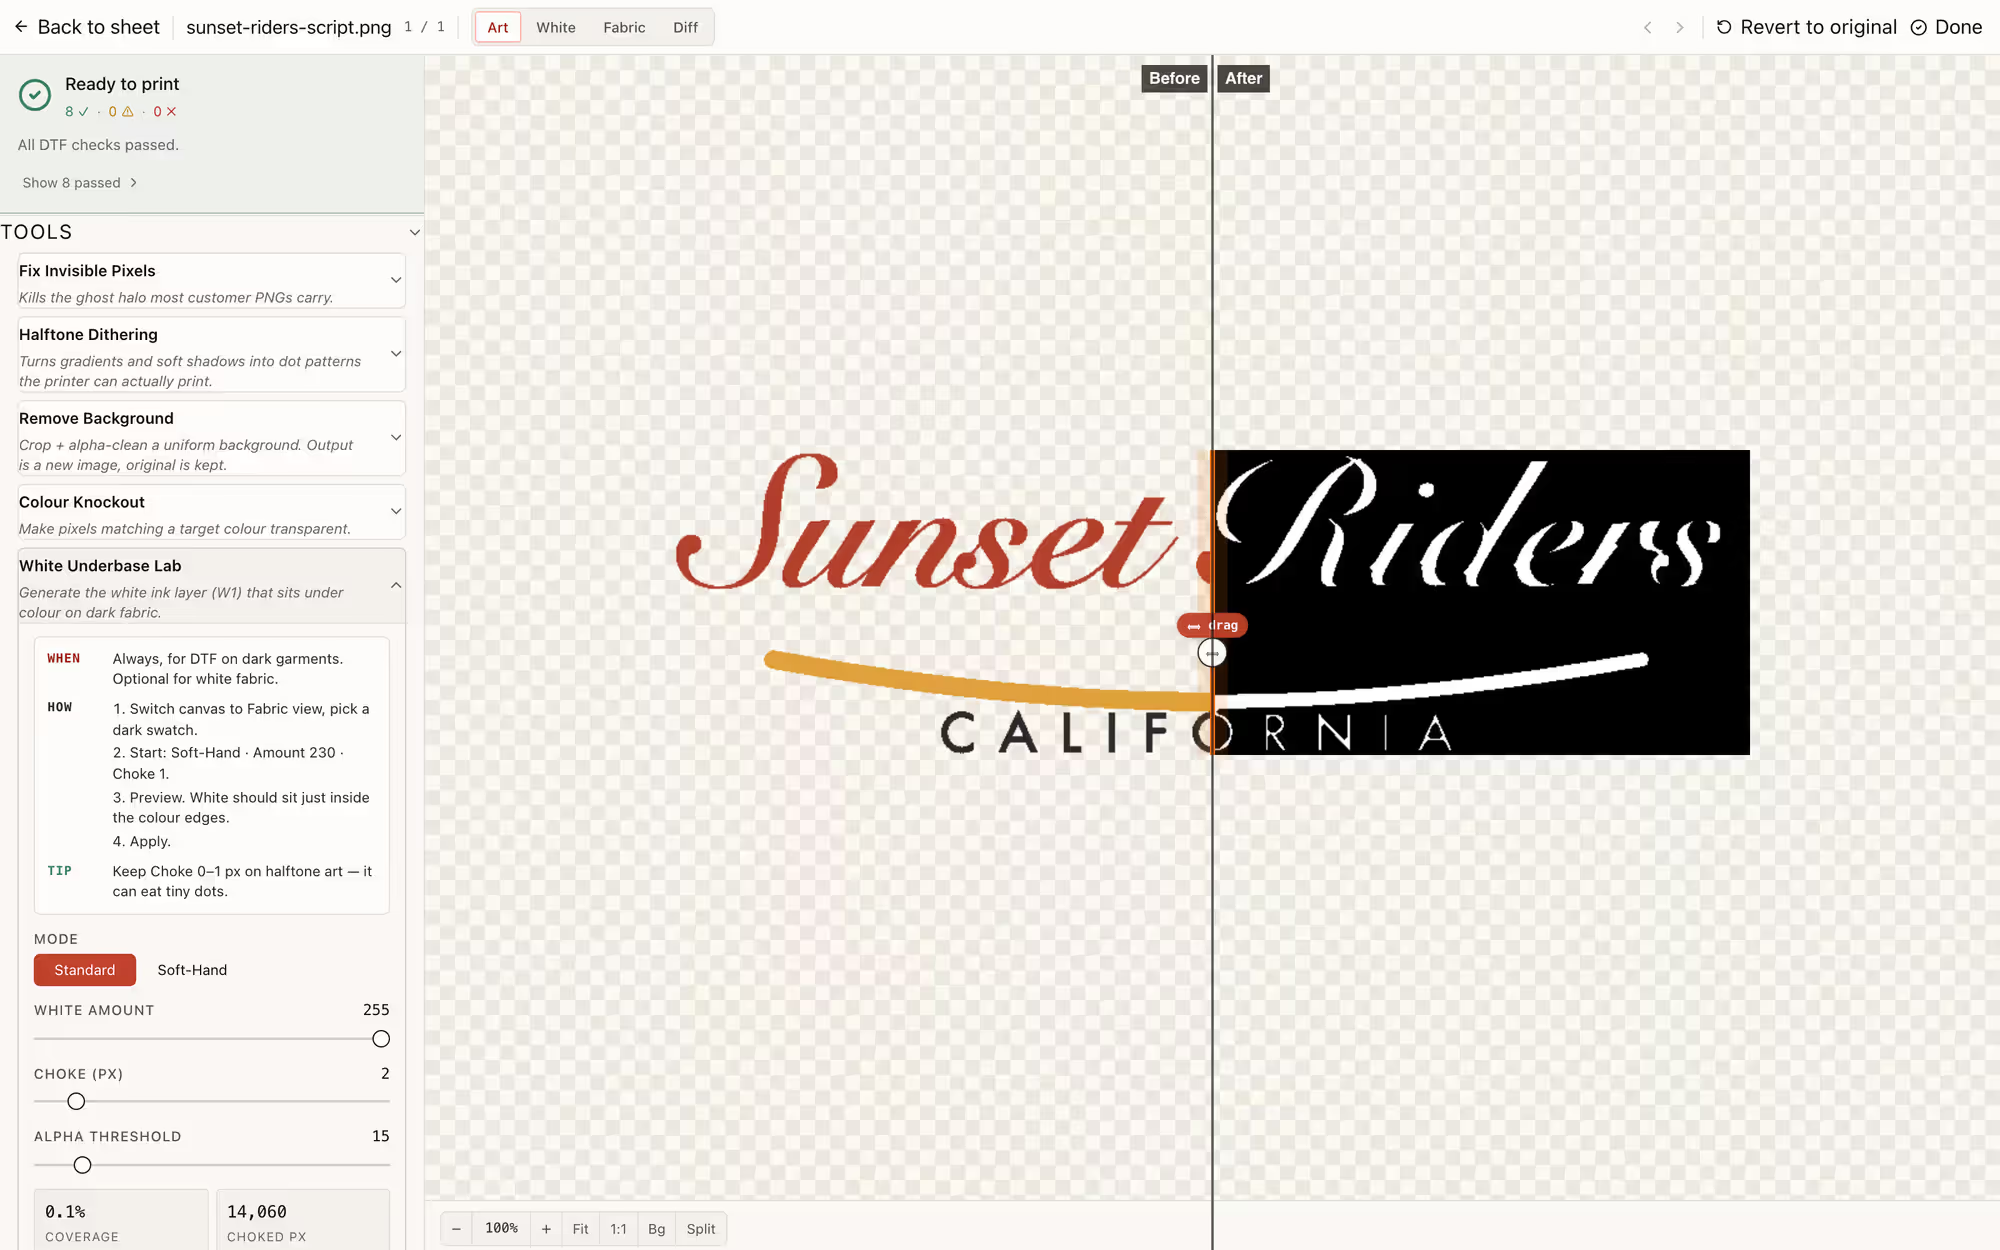
See the white channel before it hits film.
Alpha-derived white with choke 0–10 px (default 2), alpha threshold, standard or soft-hand modes and halftones — with a draggable before/after split of the exact channel the RIP will receive.
Step 4 · Export
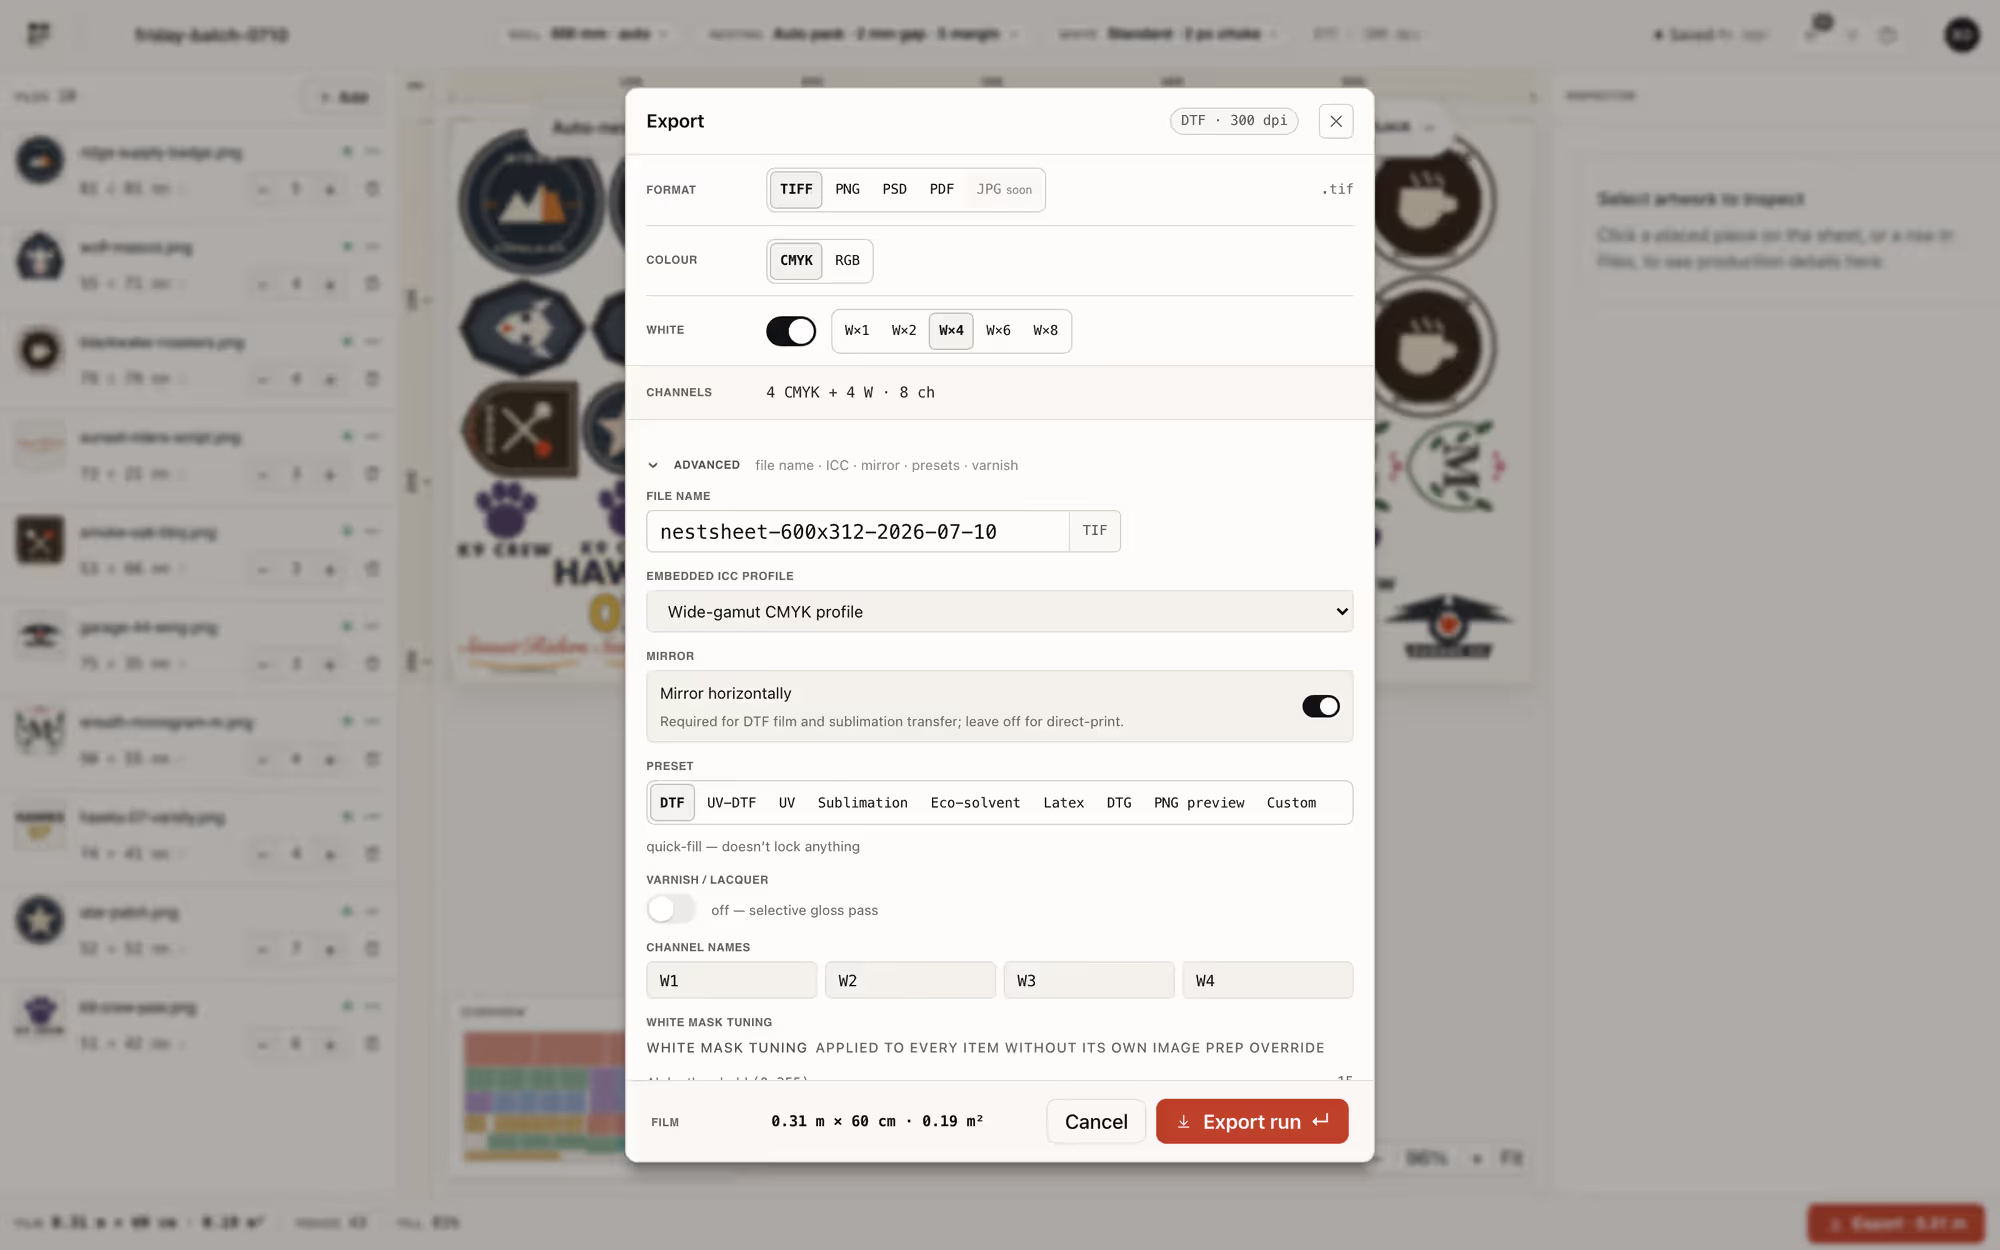
Write the file your RIP expects, first try.
Nineteen recipes across TIFF (up to CMYK + 4 white + 4 varnish), PNG, PSD/PSB with real spot channels and PDF. Six RIP presets in the box — MainTOP, CadLink Digital Factory, AcroRip, PhotoPRINT, SAi Flexi, Generic DTF — and every channel name editable.
What it costs
Which plan fits this shop.
Monthly allowances are measured in the square metres you actually export — 1 standard sheet ≈ 0.5 m². No per-order commission, no per-computer licence. Full allowance table on the pricing page.
Free
$0
30 m²/mo · about 60 average sheets
Starter
$49/mo
100 m²/mo · about 200 average sheets
Pro
$149/mo
500 m²/mo · about 1000 average sheets
Studio
$399/mo
2500 m²/mo · about 5000 average sheets
Related reading
From the blog.
FAQ